Solar Powered Phone Charger
Hi,
This was one of my more involved projects, taking about three months from original design idea to 10 finished products. This was a challenging project because it required not only making everything work, and work well, but it also required using parts and building it small enough it fit into an Altoids tin. After seeing a video on YouTube where someone built a solar powered phone charger from a small (5″ x 5″) solar panel and a battery powered USB charger, I decided I wanted to build something similar. The original design was just too bulky for me and caring around a box about the size of a tissue box seemed like a dumb idea, so I borrowed the Altoids tin idea from an entry in Make Magazine, where they built a “Mint Tin Amp” audio amplifier.
Batteries would be a good idea too, and after trying out some AAAs I decided they didn’t have enough storage capacity for me. Each AAA battery had a capacity of approx. 850 mAh so 850 x 2 is 1700 mAh total. Mili Amp Hours isn’t the best unit for dealing with this stuff so I converted mAh to Wh (Watt Hours) using an average voltage on the batteries of 1.1v (which is generous). We know that watt-hours = milliamp hours × volts / 1000 so 1700 mAh x 1.1v /1000 = 1.87 Wh. Not a whole lot. According to Wikipedia (The most trusted free encyclopedia 😉 the battery storage of an iPhone 5/s/c is 5.45 Wh. The magic goal here is to provide a full charge to an iPhone. Online, I found some beastly 3000 mAh rechargeable AAs. (They can be found here: http://www.ebay.com/itm/12x-Rechargeable-AA-3000mAh-1-2-V-Ni-MH-battery-BTY-cell-for-MP3-RC-Toys-Camera-/121426504174) Recalculating the storage of the new batteries gives us 6.6 Wh! Thats more then enough to fully recharge an iPhone 5/s/c.
After sorting out the battery situation, I turned to the solar panels. My requirements were: panels that fit in my tin, panels that were already coated in clear protectant, and lastly their peak voltage had to be above 1.5v. After lots of eBay browsing (eBay is by far the cheapest place for parts like this) I had found the perfect panel. I ordered twenty of them thinking I’d make 20 chargers, and also ordered some zener diodes for battery discharge protection and some pushbuttons.
After that I had to figure how to get the ~1.2v of the battery up to 5v for the phone’s USB charging cable. Again after searching eBay I came across a small prebuilt PCB that offered what I wanted, a simple 1.2v in and 5v regulated power out to a USB port. I ordered them up and when they got here and I tried them out by plugging in phone charging cable, and nothing. At first I thought they were broken, but then after some online research I found out that Apple products need about 2.7v on their data lines in order to even want to charge. The solution was to create a voltage divider with some resistors. I did a lovely job bodgeing the resistors to the charging circuit and low and behold, after that it worked like a charm.
Lastly, I cut holes in the Altoids tin, put electrical tape on the inside of the tin, so as not to short anything out, and started assembling them. The assembly process is quite tedious and takes about two hours per tin from start to finish. I had a great time building them and to recoup the costs of parts, I made extra chargers and sold them at school. People were very impressed with them and they would happily pay $40 for a small emergency phone charger. I made 9 chargers, and when all was said and done, I sold 7 of them and kept two for myself. If I ever want to make 10 more (I bought the parts for them) I could, but spending 20 hours repeatedly building the same thing get very tiering very fast.
In the end it was really fun and I learned lots for this project. I love being able to teach myself by giving myself challenges and then trying to solve them. When all was said and done, I had had a fun two months working on designing, ordering parts, and building this project and I also walked away with an $200 including cost of parts. People came to me telling me to turn this into a business, and it sounds like a great idea until you realize that you have to spend two hours per charger building it. Maybe one day I will turn it into a business and outsource labor and such, but for now, I am really happy that I just had a fun time doing it.
Here are some pictures of the Altoids Phone Charger:

Here is a view from the outside. The red button is the charge button, press it to send power to the USB port.
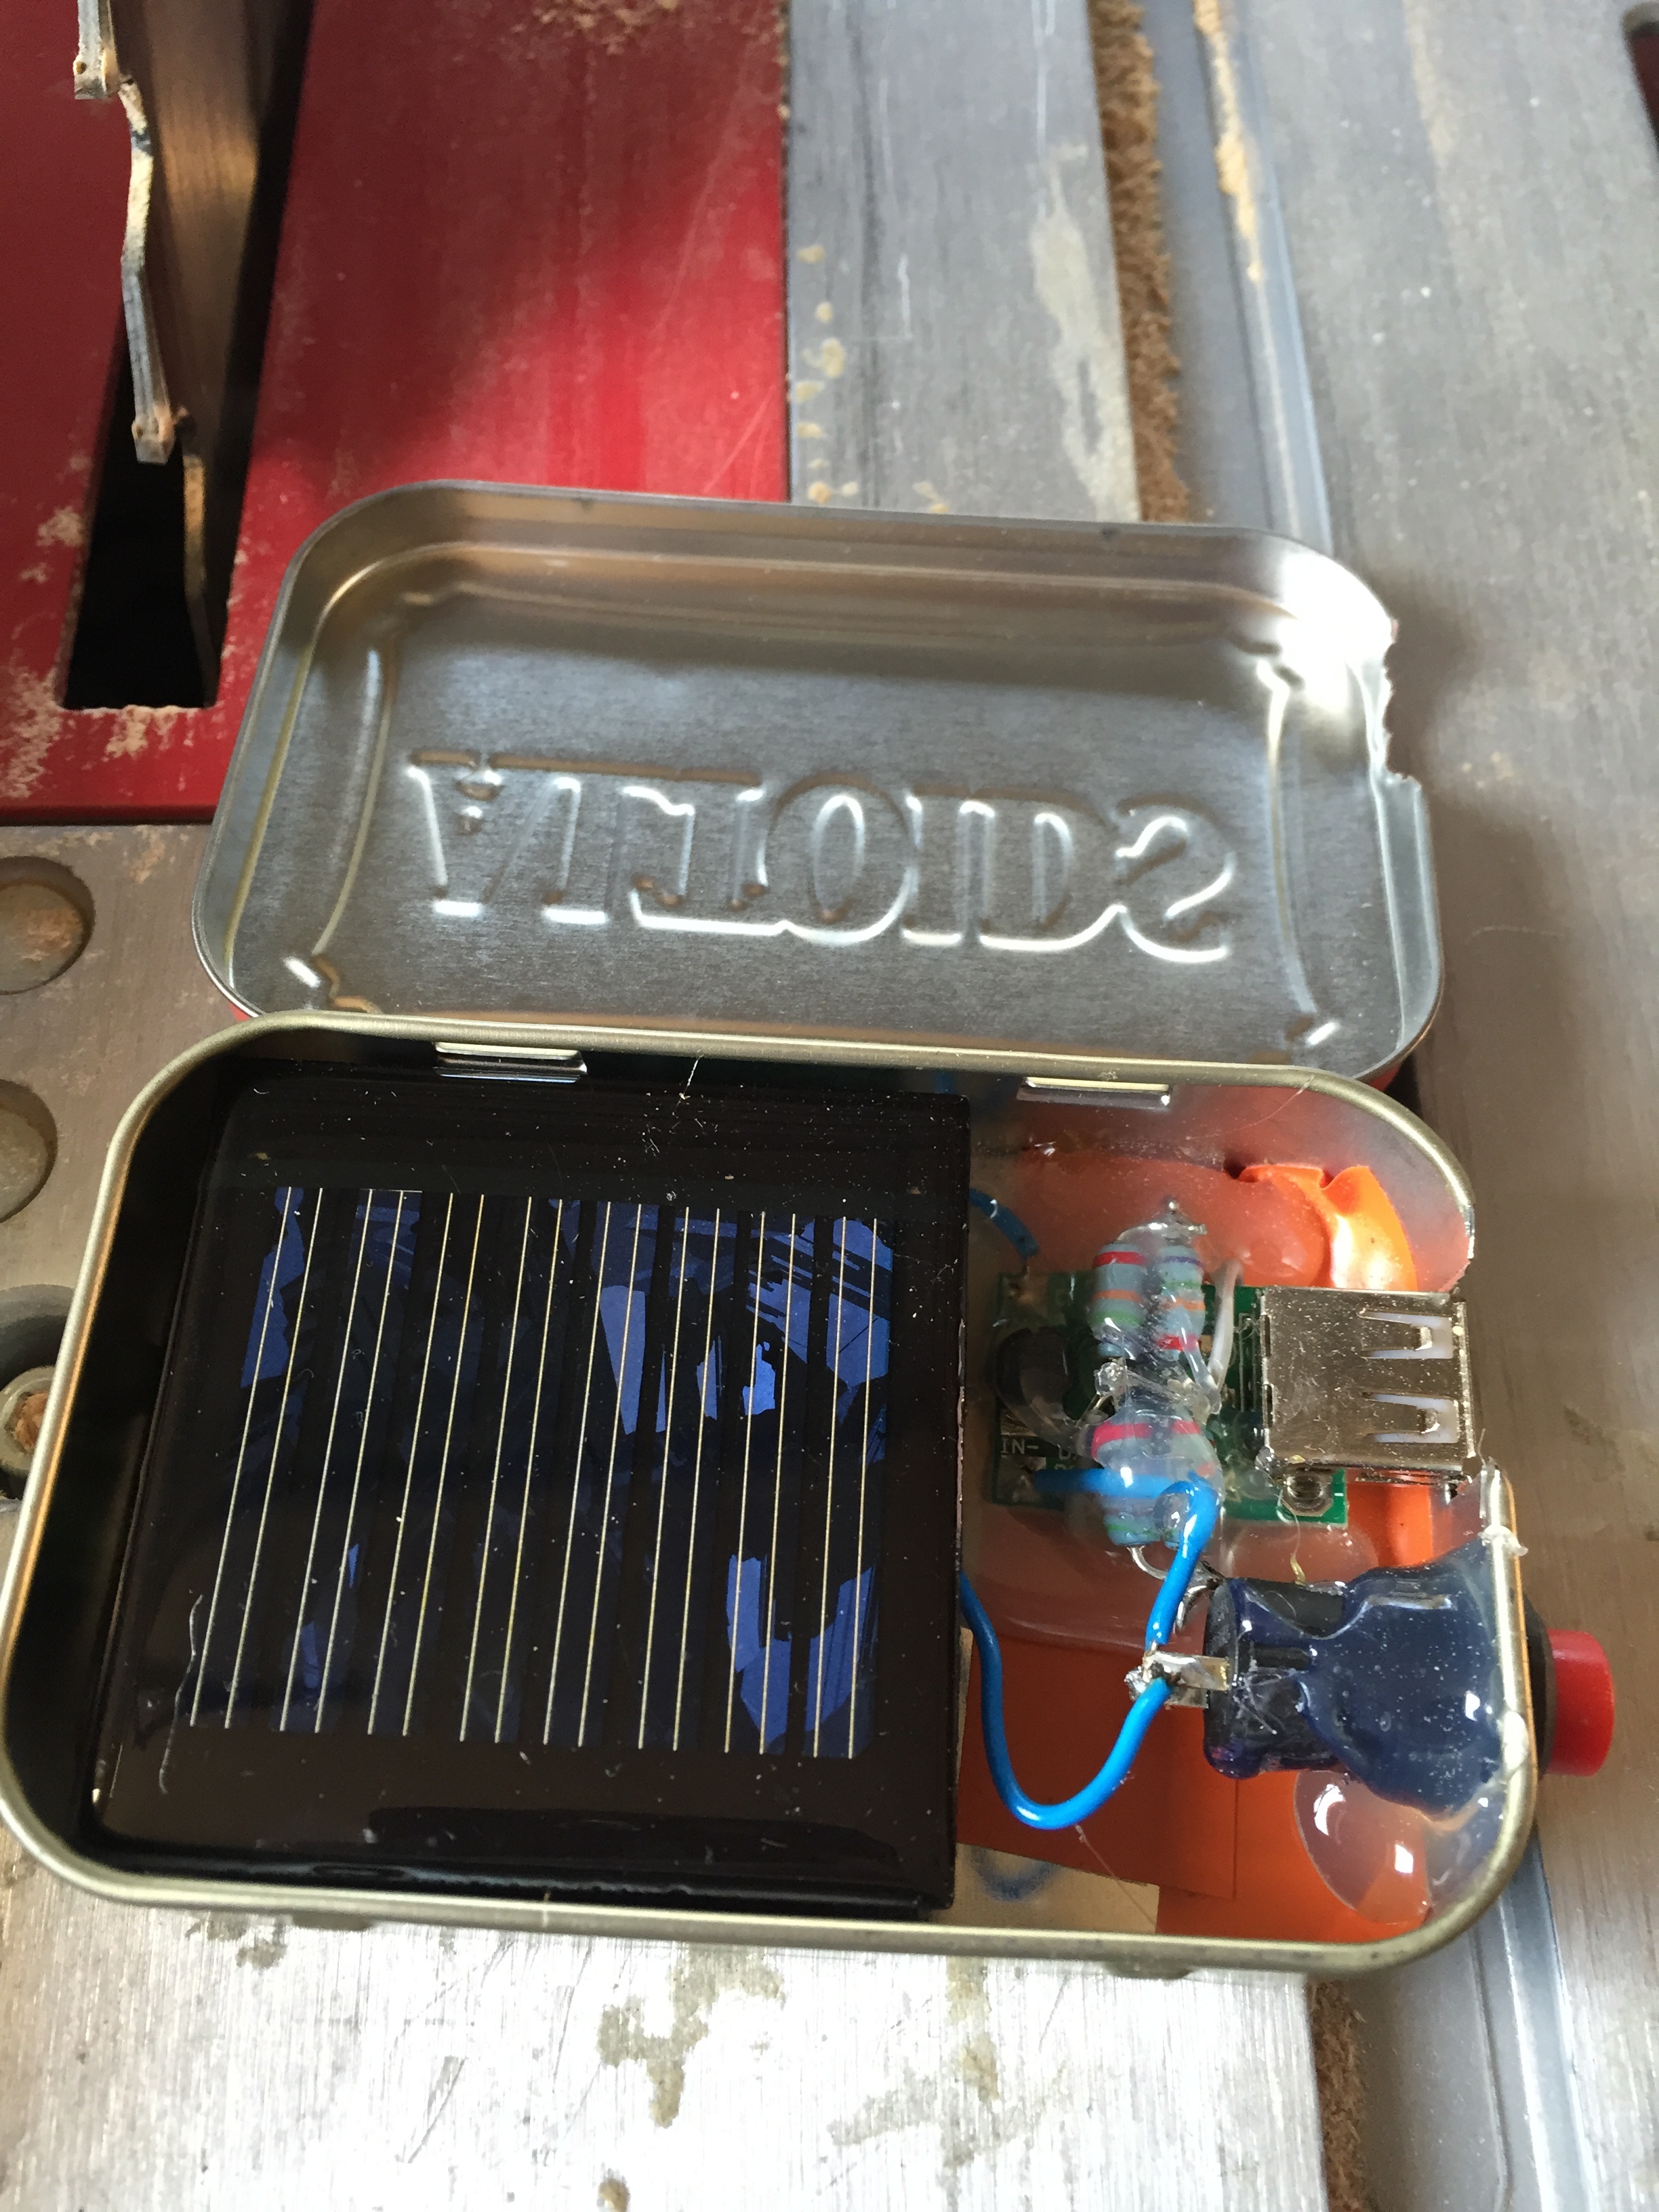
Here is an inside view of the charger. Notice that the solar panel fit just barely into the tin.

Here is a closeup view of the electronics. I used a lot of hot glue to keep everything in place. Notice the resistor voltage divider on top of the USB board. If you look right below the edge of the solar panel you can see the diode soldered directly to the battery.

Here the charger is charging up an iPhone 6. With the iPhone 6’s huge battery, it won’t charge it fully but it comes close. Definitely enough juice to call people in an emergency or find your way home when your lost.